
New Journal Jitters, how to shake the fear of starting!

Welcome!
As a journaler, I get asked this one question a lot: “Aren’t you afraid of making a mistake and ruining your journal?” Oh my gosh, YES! But that NEVER stops me from starting a new journal… nor should it stop you either. I have a few tricks that I have learned over the years that optimize the organization and layouts of my journals that I promise will set you off onto the right path, fearless and ready to conquer!
Before we jump into setting things up - you want to make sure you have a pencil and a good eraser close by. I use pencil for everything, as it’s very forgiving! Once you get things down, you may be more inclined to just use a pen, which I do, OVER the pencil not instead of it.
Here are the main pages that you want to lead off with in your Journal, and I will walk you through each:
Setting up a KEY
Creating a INDEX
Penning a CALENDAR full of important dates
Making GOAL pages
Setting up a KEY
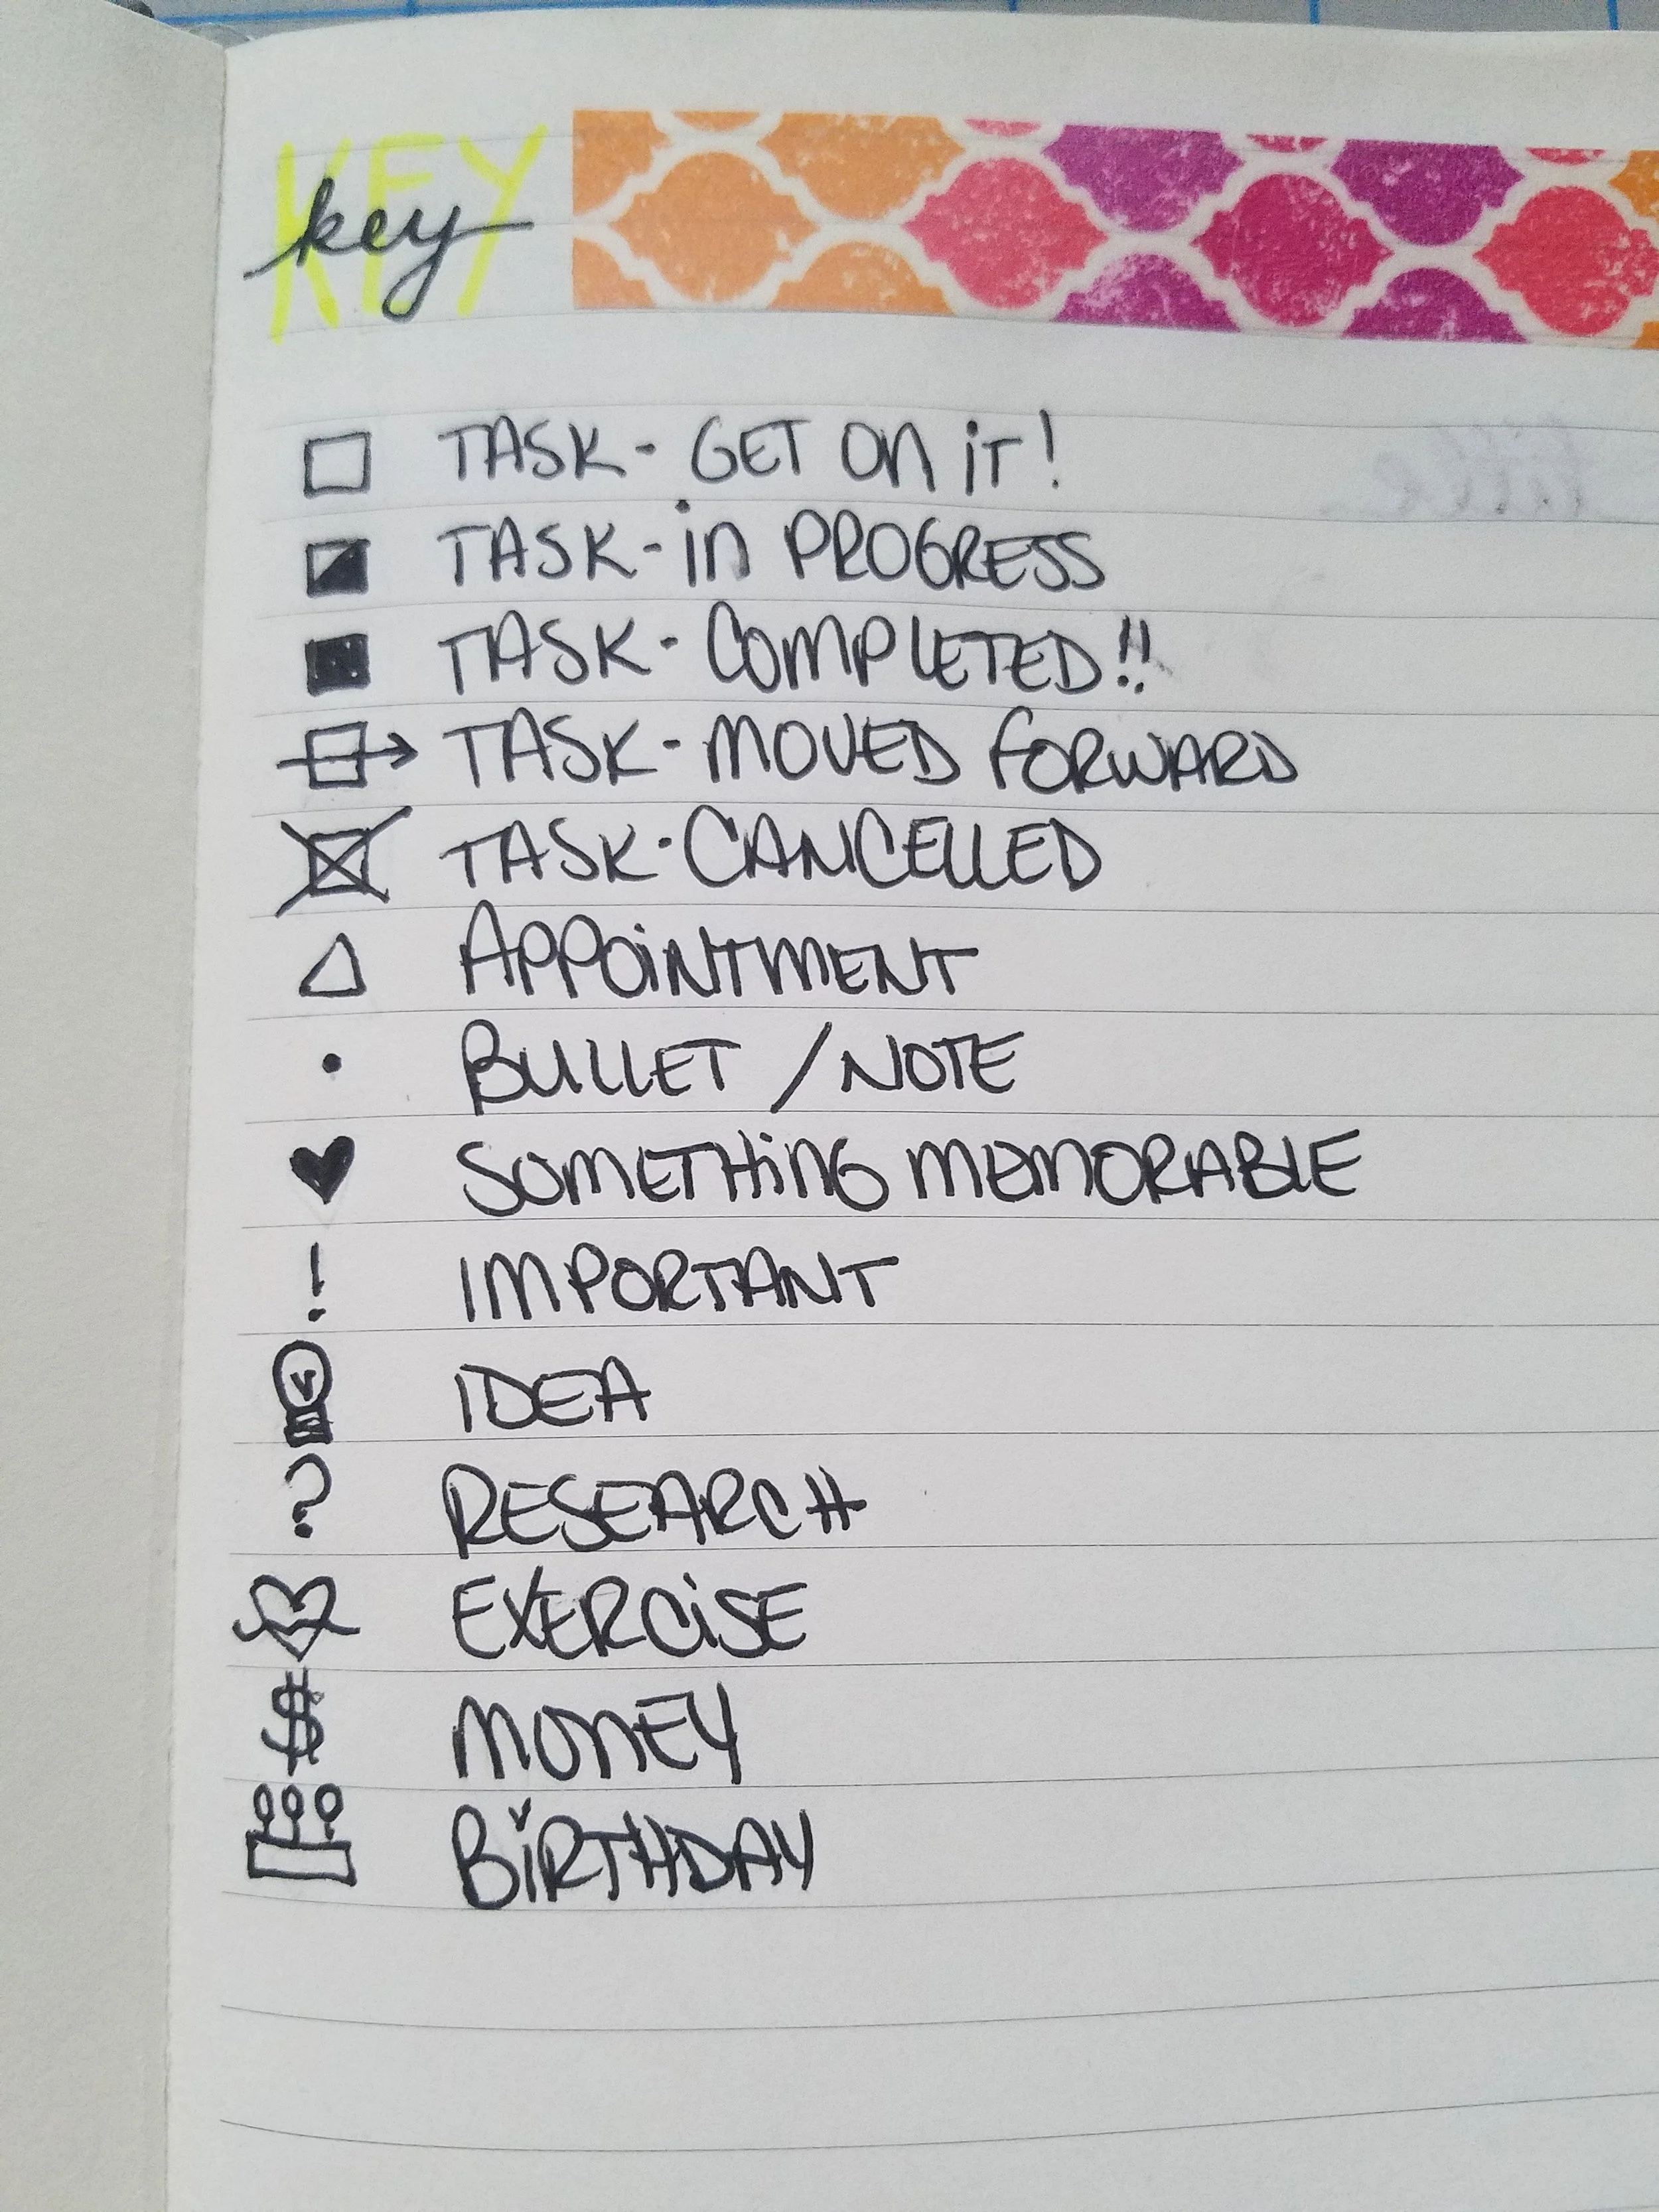
A key helps you to make note of things quickly, using symbols that you identify with. It is also your FIRST list in your journal! The founder of the Bullet Journal concept, Ryder Carroll, uses dots, dashes, and X’s to track Bullets, Tasks, Notes, and Events. To read about his method, go here: https://bulletjournal.com/pages/learn
Tasks - to do, in progress, completed, cancelled or moved
Events - meetings, birthdays, place to be, etc.
Signifiers - (!) - used for something important, (?) - used for something to research .
Notes - using dashes to make simple notes
In the first image below is my third Index, which was in my 2016 journal. I had a lot of symbols that I used over the years, and put them all in this key. The second image shows similar symbols with a break down when they are used. It also introduces a color and the subject that each color applies to. The third image is in my newest journal which I dropped some of the symbols and added color. Super flexible - customization is up to the individual!
Other symbols and colors that I have seen used include:
Celebrations: maybe using a balloon or doodle a simple cake will remind you that a celebration is happening
Idea: Draw a light bulb for an idea or a thought that needs more exploration
Work outs or exercise: draw a barbell, a sneaker, a lotus flower for yoga. There are also plenty of templates available or stickers that can be used
Students: Tracking classes could use a key that designates a color for each class. When you are assigned homework, write out the assignment with due date and then use a highlighter in the appropriate color.
Parenting: Use the color method for tracking family members schedules, important games, travel plans, etc.

Here are some things that i track using color.
TIP: Leave yourself space on your KEY page to add symbols as you go. Remember, nothing is fixed, you can add and change at ANYTIME!


Here you can find a link to a video I did a few years back, that has relevant information on the Key
Creating an INDEX
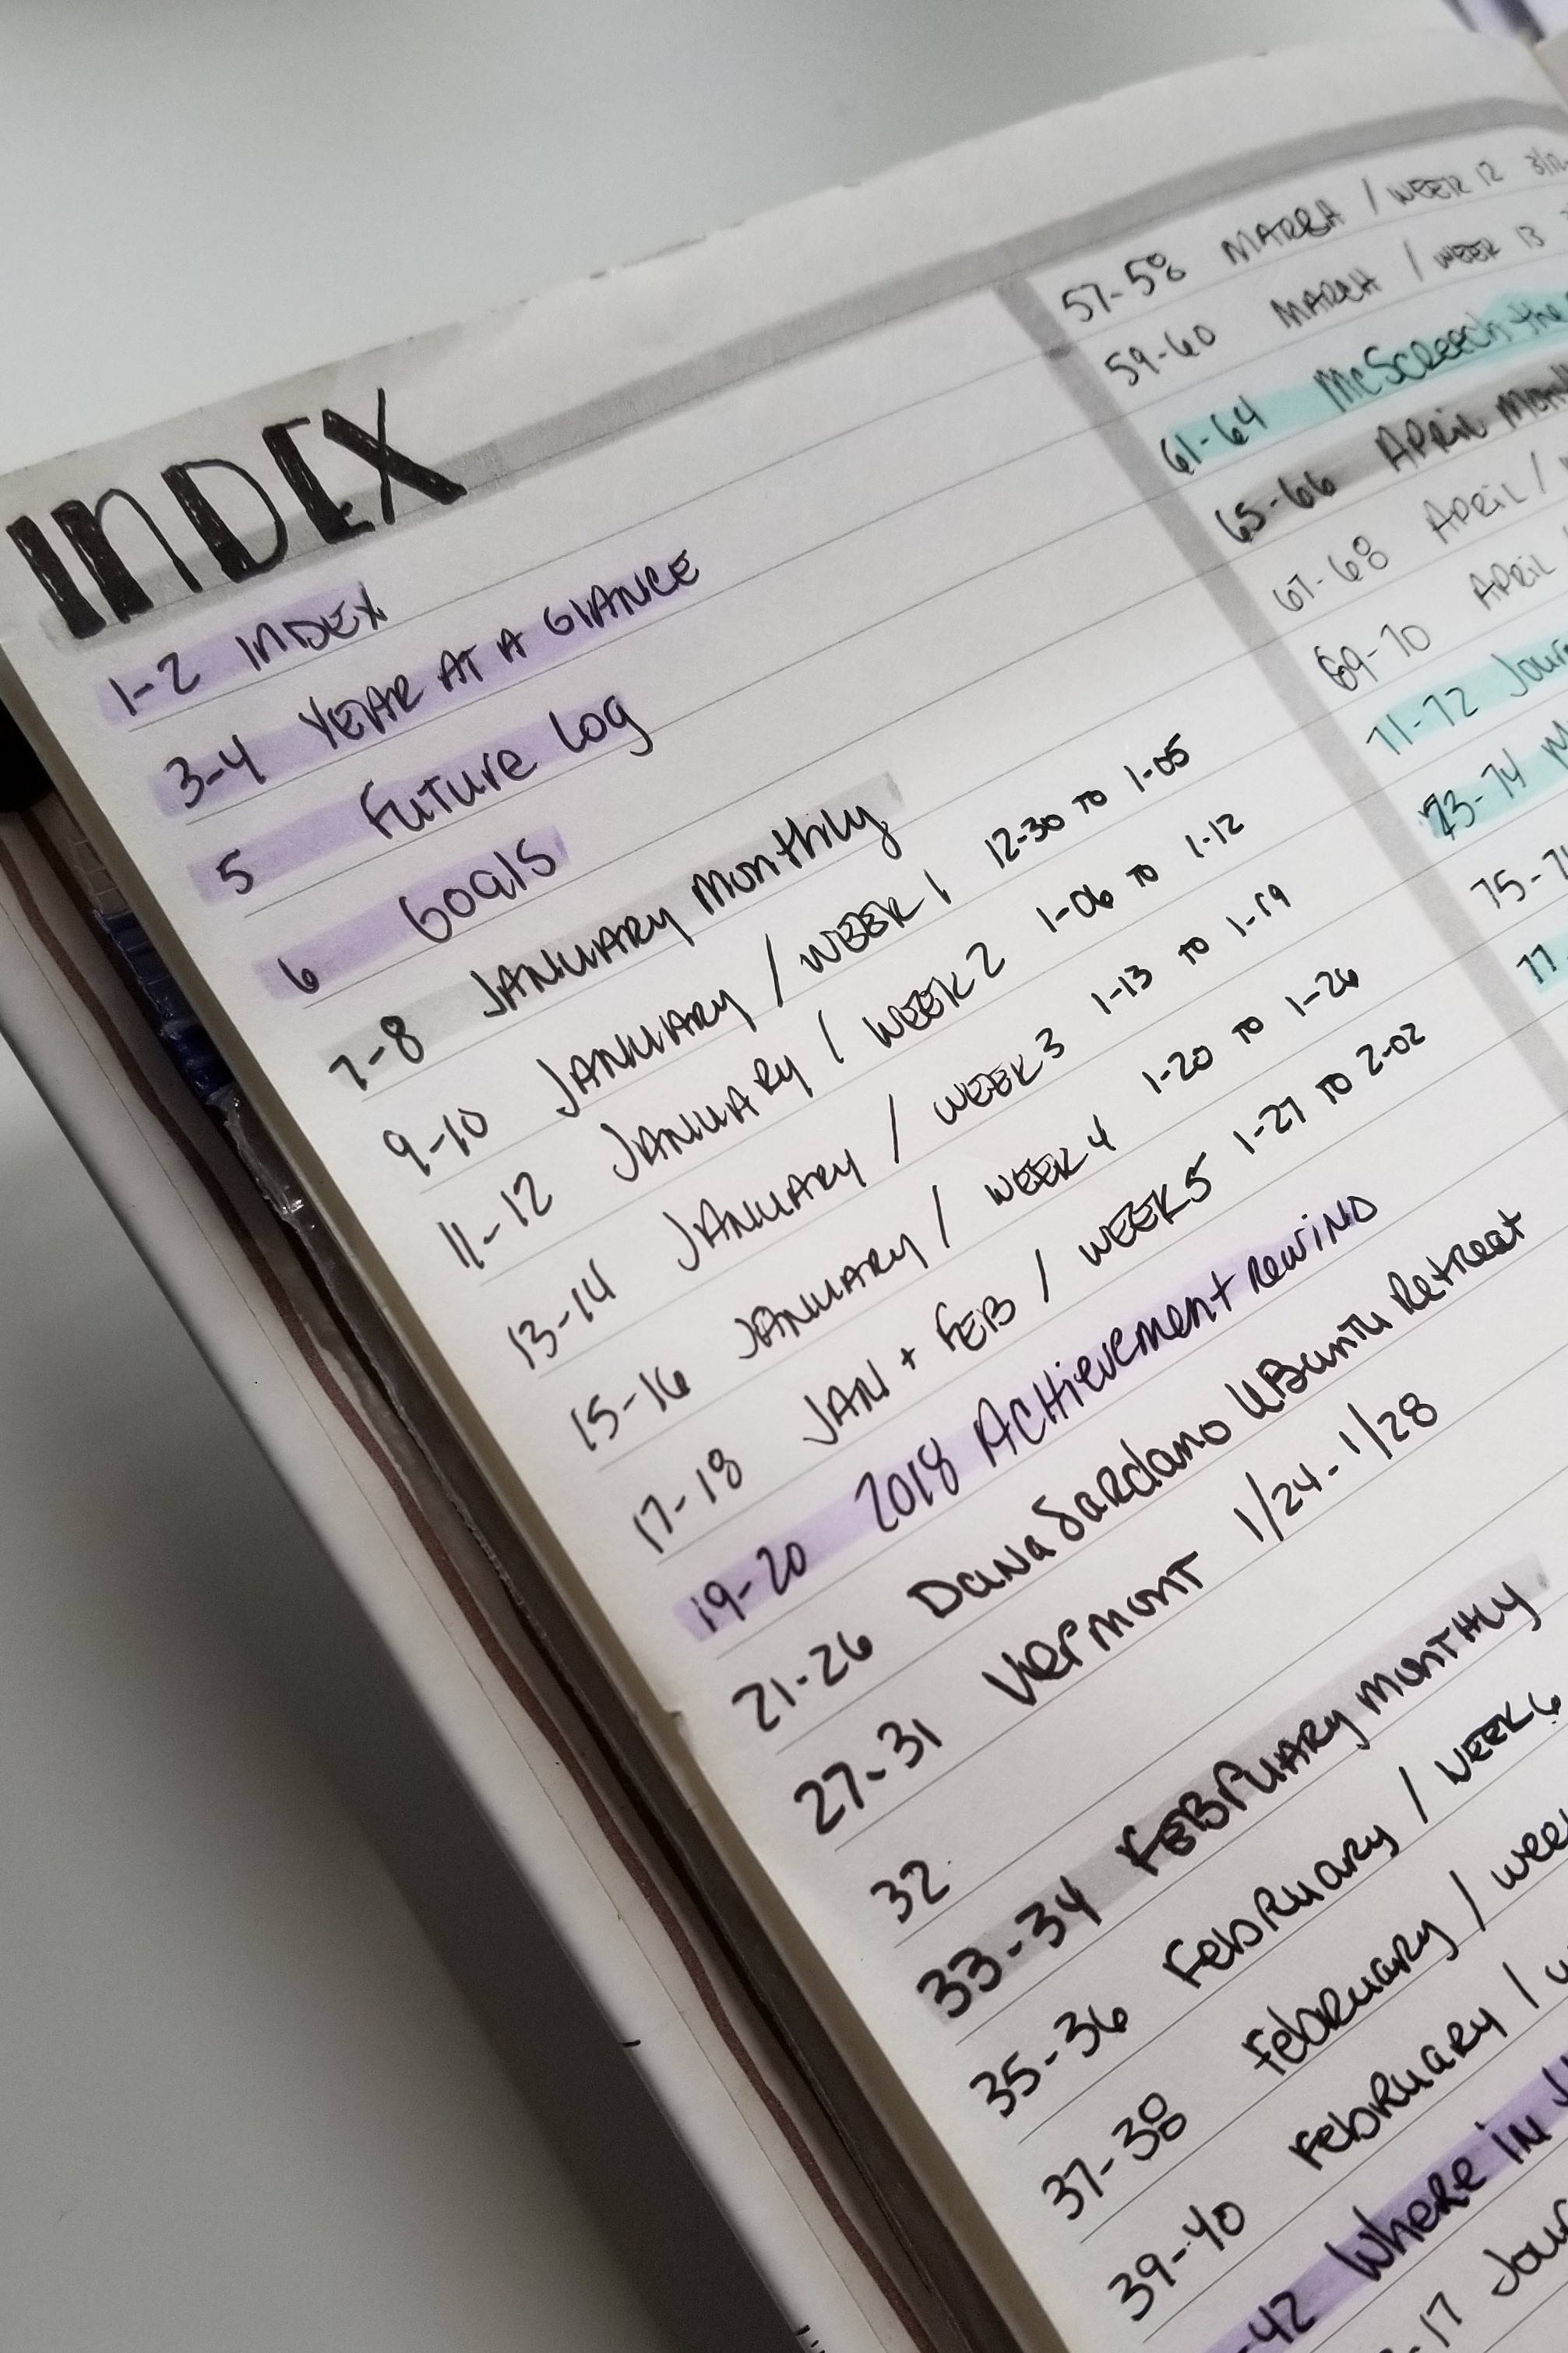
The Index. This is your second list, and will be built as you add pages to your journal. It will contain the names of other lists you will create with references to the page numbers where they live. Easy to create and pretty darn handy.
Let's create yours now! This will take approximately 20 minutes
Number EVERY lined page in your journal in INK. There are 250 of these (depending on the manufacturer)
Go to Page 2 of your Journal. This is where you will set up your Index
The index should span across 2 pages (left side: page 2 and right side: page 3)
Add your title - Don't forget to use pencil first & be creative!
Create your columns - mine are simply "Page" and "Title"
Flip to Page 4 & 5, add the title and create your columns - your Index will be 4 pages in total
Now, add content to your Index! Page 1 is your first entry, with the title of "Key". Pages 2-5 should have the title "Index"
Add a Washi tape tab to the top right corner of page 3. This will allow you to grab the tab to quickly update as you go!

Penning a CALENDAR full of important dates
This is one of my favorite parts of Journal creation. While it is the longest to set up, it is well worth the work, and is referred to month after month. Creating a year at a glance calendar is your opportunity to pen a calendar in your own handwriting, which enables you to become intimate with the days of the month, how they correlate to dates, and the number of months that you will be tracking in your calendar. Whether you want to track 18, 15 months 12 months, you will recognize where certain critical dates lie in each one of those months.
Picking the right layout: I have seen so many different layout, but personally I have only used the second image below as my Year-at-a-Glace. I use the format in the first image for my work journal, it makes it so much easier to track future events or note something that has happened quickly (training, emergency, illness, etc.)
Number of Months to track: I always track at least 12 months. I have started most of my journals in December, but when I ran out of room in my 2017 journal, I started a new one in October. Another option for each person to choose.
Check out this video I did, which covers the above and demonstrates how to quickly make this layout happen: https://www.youtube.com/watch?v=tKi0Ahzs1do


Now that you have your Calendar created, fill in special events and color-coding them on your Year-at-a-Glance calendar ensures you will never miss that important event again. you will refer to your Year-at-a-Glance Calendar as you plan each month, and with your special events color-coded, it will really get your attention.
If you used image (1) above, you can use this for any Future dates you get throughout the year. You know, the “Hey, I am having a BBQ on June 3rd when he pool opens!” - But it’s only February, how am I going to remember that? Having no place to stick this normally, Image (1) gives you a place! Otherwise you can create a “Future Dates” page for them. For how, click here: http://www.stitchesbyleslie.com/blog/2018/01/06/day-6-future-
Making GOAL pages
I have lofty goals. For myself, my family and my business. I spend a bit of time at the end of each year thinking about what I would like to see, do, create, and be in the year ahead.
Some goals are big - walk 180+ miles across Scotland in 12(ish) days
Some are not - spend quality time each day with my family (notice quality - not quantity)
No matter the objective, there are a few basic rules to follow when creating your goals and working to obtain them.
Set Goals That Motivate You. When you set goals for yourself, it is important that they motivate you. Make sure they are important to you and that there is value in achieving them.
Set SMART Goals
Specific. In order to set goals you can reach, you need to make them as specific as possible.
Measurable. How will you know you have reached it?
Achievable. Make sure it's within your control to obtain. For example, based on where we are as a species, setting a goal of living on Mars by 2018 is highly unrealistic.
Realistic. Again, think living on Mars.
Timed. Set a date or month in which you want it to be done. You will work backward from this date to obtain your results.
Put them in Writing. Using the Annual Goals section of your "Year at a Glance" calendar is the perfect place. You will look at this calendar multiple times each month. Get into the habit of reading your Annual Goal each time you are there.
Reference them often. As you set up each month you will be adding tasks and events that align with working toward your goals.
Stick With It! A goal is a dream with a plan and a finish line. If you can dream it and plan it, you only need the disciple to obtain it.


Once you have these pages completed, you are off to the races. You can now start thinking about your Monthly and Weeklies (if you choose)… or any other pages to maintain lists. There are so many options, and I have quite a few noted in my blog already, just take a peak!
Leslie Grossman is the founder of Stitches By Leslie, Inc. and the creator of the patent pending Journal Mate. For more information, reach out!